Showing posts with label slab. Show all posts

Monday, November 1, 2010

Floating floor installation Day 2, more pain and suffering but we're getting there.

Today I completed about 60% of the sitting room floor before lunch while Tina prepared the family room for installation; removing all plaster lumps, vacuuming and underlay. We then started on the family room after lunch.

Before: Family room cleared of all furniture (of course), slab as clean as possible. If you look closely out the window, you can just see the head of Mr Meyer, our lemon tree - despite our poor track record of keeping plants alive, Mr Meyer seems to be thriving even in the constant rain we've had the last few days.


Next picture, about halfway done with the family room. The complicated thing here is that we started the entry and hallway before the family room, and we want the boards to line up. This involved lots of measuring and calculating, and allow 15.9cm of space before laying the first full board in the family room. Once the boards here meet up with the hallway boards, I'll go back and trim a line of boards to fit against the wall.


Essential tools for floating floor installation: Hammer, pull bar, rubber mallet, tapping block, spacer blocks, pencil, ruler, measuring tape, a bigger hammer when you realise you should've spent more than $3.99 on the first hammer which weighs as much as a banana and is about as effective. Plus a few bandaids for those scraped knuckles, and lots of swearing when you accidently bang your rubber mallet against the wall and it leaves a big black scar that you'll have to come and patch/repaint later. Or just pay someone else to deal with the pain and suffering of installing a floor. But I figure we've come this far, we might as well push on until it's all done - it's like watching a bad movie, thinking you should walk out but there's only 20 more minutes to go.

Finally, the end result, family room pretty much all done, but where it extends into the hallway at the bottom of the picture not yet done.


Pretty happy with how things are going so far, but the complicated part really starts tomorrow where I have to make sure the family room floorboards are perfectly parallel with the hallway flooring. Plus doing the study with the double cavity doors - I think I'll have to put a 3mm expansion gap filled with cork, caulk or an expansion joint, depending on how closely we can cut and lay the flooring.

I've also discovered a little dip in the floor, right near the entrance door - d'oh! I think I'll put a potplant or something over it to stop visitors walking on it and noticing the defect. High tech solution, right?

T&T

Sunday, October 31, 2010

Flooring update: Floating floor installation Day 1

Been a busy week, so not much time for blog posts. Tina's brother made a surprise visit from the UK, so spent most of the week eating out and stuffing our faces. Anyway, we made up for all that indulgence during the first couple of days of the Melbourne Cup long weekend, getting started on our floor installation!

The delivery of 130sqm of flooring and underlay was scheduled for Saturday, but ended up arriving Friday afternoon instead. We measured up the ground floor, and it came to 122.5sqm - but decided to order a bit more to allow for offcuts, excess etc - always a good idea!

Now, at this early stage of the post I figure it's a good idea to make this disclaimer: installing floating floors is difficult, time-consuming and back-breaking labour! Don't believe the salespeople when they say anyone can do it with a few simple tools in half an hour, it ain't true! While we have decided to install our own floating floor, I'm certainly not recommending everyone reading this blog to give it a shot unless you have the required tools, a lot of time, forgiving neighbours who don't mind 8 hours of power-tool usage, and a spare labourer or two, this is NOT a one-person job! On that note, Tina has done a superb job as my unpaid labourer, preparing floors, taping underlay and moving lots of floorboards around - gutsy!

Anyway, getting back to the story, Friday and Saturday was set aside for preparation. As one of my uni lecturers used to say - Proper Preparation Prevents Piss-Poor Performance! Lots of lumps of plaster and other junk was left on our slab, so it took a few hours going around on hands & knees with a hammer & chisel, chipping off all the lumps. Our slab was pretty flat - ideally you don't want any more than 3mm variation from flat over a 2m run. We then swept and vacuumed the slab in preparation for the underlay.


The underlay is 3mm foam with attached plastic membrane - important if you're laying a floating floor on concrete, to prevent moisture building up and warping the boards. You can lay floating floors directly over old floorboards, vinyl tiles, tiles, concrete, providing the foundation is stable and not too uneven. We taped over all the joins with duct tape. The underlay runs at 90 degrees to the direction of the floorboards.


The first row we laid along the long side of the entrance. The little black blocks are spacer to maintain approx 10mm gap between the floorboards and the skirting to allow for expansion and contraction of the boards. We'll cover up the gaps later with some flat bead/quad. The brand we chose for floorboards was Tarkett, using their "clicky-locky" system, which is actually really painful to work with, if you follow their instructions! Their idea of an easy installation is to lay an entire line of boards, then lift & click it into the previous line of boards. Easy to do, if you have 2 boards - impossible if you have a long line of boards 4 or more! To solve this installation problem, I decided to grind off the end tongue of every second board, that way we could install 2 boards at a time and tap them together.


We then just kept adding rows - we staggered the start of each row by approx 1/3 or 1/2 of a board. With the random design of our floorboards, keeping the joins consistent isn't necessary - good for us! When it comes to placing the boards in the kitchen, we'll use wood-glue to seal up the joins during placement to minimise problems of water spillage.

Finally we decided to wrap things up around 8pm (local laws state no power-tool usage after 8pm, or before 9am) and I figured I'd annoyed the neighbours enough. Plus today was Halloween - saw lots of kids walking up & down the street, but probably scared off by the noise my drop-saw was making! Luckily for us too, our neighbours dropped in for a stickybeak this afternoon and loaned us a circular saw - thanks Anthony & Suzanne!


So, this is the end result for about 6 hours of floating floor installation by a couple of inexperience n00bs to DIY flooring. My parents dropped by and were impressed so far - certainly better than the dusty concrete slab we were putting up with before! Essentially we've got the entry done, and hoping to complete the sitting room and study tomorrow now that we're getting the hang of things!

Just to repeat - installing floating floors isn't easy or simple! We slept for 12 hours last night exhausted, and that was only after slab preparation and the first 2 rows of floorboards. Will probably get the same amount of sleep tonight as there's another big day ahead tomorrow.

Thanks to everyone who have ordered our soft-closing door dampers from tim-and-tina.com! We're about halfway through our initial order of door closers and hope everyone is having as good results as we have experienced!

T&T

Saturday, July 10, 2010

Day 200: Laundry floor slab repaired

Concreters were on the job this morning, with the laundry floor repair now complete with new concrete poured and the laundry cabinet replaced - now laundry tiling can go ahead! The laundry cabinet and walls will need touching up though, due to the amount of concrete etc flying around.


Powder room next; floor tiling and skirting completed. Also the vanity kickers here have been tiled.


Close up of ensuite shower: tiled shower base, with cuts in tile to allow for correct fall towards the waste. One tile on the left looks a little peaked compared to the rest, but should blend in well after grouting. Also note the flush finished base - there's only that tiny white lip between the shower base and the ensuite floor, where the shower screen/door will butt up against.


And finally, just to highlight the extra care our tiler has taken, check out this join between floor tile and the door architrave. Even without any grout in yet, it's almost a perfect fit - great job!


Can't wait to move in - things look great! Tina was saying it looks even too nice to be our house, since we've lived in so many... erm.... not nice houses in the past!

T&T

Friday, June 11, 2010

Day 171: Laundry waste pipe moved, painting has commenced

According to MyMetricon, we've had the Fixing Stage completed as of 10.6.10! Time to check under the couch for coins and sell off unwanted items on ebay to pay yet another 20% of the build cost - though this means there's only 10% +/- variations to go, and that'll be at handover!

Today, someone with a very big hammer came in to cut out the floor of the slab in the laundry to move the waste pipe; which long-term readers will recall was incorrectly positioned under the laundry cupboards.

I didn't go to the house today - this is Tina's photo - but to me, it looks like there's a mini-garden in the laundry, where we could possibly grow vegetables. Ideally though, we'd have a bit of concrete and some tiles there, which is the conventional use of a laundry.

From our independent inspector's report:

"Item 18. The plumbing floor waste in the laundry which is to be located below the washing
machine is installed with in the laundry cabinetry area. The drainers will be required to
relocate the pipe. This will involve cutting and jack hammering the slab. The appointed
engineer will be required to supply a rectification plan to reinstate the slab removed as the pipe is being significally relocated. The slab penetrations are sealed with termite protection seals. This will also be required to be reinstalled by the termite protection firm. Recommend viewing the appropriate documentation to cofirm these works have been completed appropriately."

So what we'll be doing is emailing our CSC and SS to confirm that we'll get a copy of the engineers' report regarding fixing the slab where its been cutout, plus confirm the termite protectin will be reinstated. That's one of the dangers of modifying a volume builder's plans too much - the additional things may not be done ideally the first time around. As long as things are fixed properly though, the end result should be fine. I wanted a drain waste under the washing machine position as I have many memories of my mum's washing machine getting blocked, or pipes leaking/splitting, and the laundry flooding the house as a result!

The painters also came today - they were meant to start Monday, but have been delayed as we've insisted on the various lockup items to be fixed first. Today, they came in and covered the stairwell in protective plastic, and started with a layer of primer on the doors. We'll have to check the doors are painted all around, including top, bottom and sides; not just the obvious main 2 sides.


Our new SS, John, also called me this afternoon to tell me of the day's progress. I did mention the manhole was in the wrong spot (see the last blog entry) and he said he'll check it out. The plasterer should be back again on Tuesday to do a final plaster fix so the painters can really get into things. MyMetricon says painting will be done by 18.6.10 which is highly unlikely - probably towards the end of June would be more realistic. I like our new SS - he's only just started with Metricon, so hopefully he'll be particularly attentive to the fine details, but he seems open and communicative, as was our last SS.

T&T

Friday, February 5, 2010

Day 45: Base invoice received

First of all, let's go on a minirant here about HP/Compaq and their shitty quality products. You'd think a multinational brand like HP would be able to build a laptop that doesn't break their hinges after a few months, randomly freezes, loses sleep/hibernation modes and have a battery life longer than 50 minutes, but apparently not. And let's not talk about the fact that HP have decided that a 2 year old laptop (that was top of the line when new) is simply waaaaay too obsolete to be worthwhile supporting under Windows 7. End result, don't trust, buy, or recommend HP/Compaq. Meh! My old Acer laptop is still used by my sister with 100% reliability; and I bought that one in 2002 - far superior.

Aaaaaanyway....got an express post envelope from Metricon today, with just a few pages, but a big bill to pay - 20% of contract! It's interesting to note though, that the progress payments are based on the contract price that you sign off on, at the final contract meeting. We had about $15k of postcontract variations (mainly electrical, roof tiles, tile upgrades), but they will be added to the final invoice, along with any other changes that may come up along the way.

No work done on site today - weather in the low 20s and constant light rain. Again, good for concrete curing, but not so good for deliveries or getting work done. Maybe some framing to start next week?

sarahv: yeah, the old house was a nice house to live in - unfortunately it was on a very busy road, right next door to a petrol station, opposite a big bunch of units. Not a great location for a residential property, but not too bad for a medical clinic! Would have liked to have the house and land (about 700m) in a different location, but alas not to be. Fond memories, but can't wait for our dream house to be finished!

Thursday, February 4, 2010

Day 44: Termite protection (?) installed, and delivery of wood

Today, the skies finally parted to allow a bit of rain to wash away yesterday's humidity. Apparently a bit of rain is good for the slab, so we're glad to see it today! We didn't expect much to be done for a few days, but arriving at the site after work, seems like people had already been at it today!


The sight that greeted us first was a few big piles of wood. Probably not enough for the ground floor frame, but certainly enough to get started! A couple of sheets of yellowtongue for the first floor as well.


Also, our slab now has a nice blue skirt on. Tina dug a bit of paper out of the bin, and apparently it's a delivery slip for termite guard protection, we think... the rain kind of ruined the paper. It runs the perimeter of the main slab, but not around the portico of outer garage wall (no timber there, just brick piers).

So far, we're quite happy at how things are progressing - lots of work has been done since the xmas/new years shutdown period! Certainly didn't expect anything done today - the problem is, now we might get disappointed if we turn up at the site and nothing has been done! MyMetricon was also updated today - a huge "Completed" bar across the slab stage of construction!

Of course that means Metricon will send me a big invoice for 20%, but who said you could get a house built for free?

R&T: Hope your selection process is going along well too... I'm still hunting on Domain for Metricon houses for sale/inspection, as we still like to stickybeak at other builder's houses. Especially looking at "real people's" houses, not just the over-the-top display home. We saw a Porter Davis house in Bundoora for sale, just off Grimshaw St, and it was done pretty nicely! Also; have a drive all along Shannon St, as you'll see another Nolan being built with Hawthorn bricks, in case you haven't seen it already!

JT: Welcome to the blog! Donvale is a beautiful area, we had a house in Mitcham that we sold to buy our redevelopment site. You'd probably drive past it a bit, it's next to United Petrol on Mitcham Rd, and the new owners are converting it to an osteopath clinic - here's a photo we took of it the other day.


It's kind of a pity that they're converting it as it was a great house to live in (except only 2 windows in the house could open because the previous owner to us had painted them shut!).

I wouldn't worry too much about the "420 days" in your contract - from what we've seen of Metricon in our area they generally get the double storeys done in 7-8 months, and single storey in about 4. Also, we don't have Gena anymore, it's Joanne now :) We liked the Hampton plan, but because it wasn't on display we went with the Nolan :) I think you're right, in that the Sycamore has replaced the Hampton, but to be honest I think the Hampton is better, mainly because of the shared bathroom between Bed 2/3 - I think that's more practical than an ensuite to all bedrooms!

As for the kitchen, I just had a look at our onstruction drawings - there's definitely a cupboard door to the island bench (I think about $150 or so?) and the pot drawers appear to have a smaller top drawer and bigger bottom 2 drawers (I think we paid $880 to get a dozen pot drawers), though there are no specific dimensions to reflect that. Unfortunately I think it depends on the salesperson/consultant you get on the day as to what kind of options you can choose to get.

One thing about building - I think it makes my working days go faster, as I can't wait to be out the door and go to our land to see what's been done!

T&T

Wednesday, February 3, 2010

Day 43: SLAB DAY!

Wooo, what a day! Had to get up early, as we figured we could fit in about half an hour of concrete watching before work :)


A lucky gold coin for the slab?


Concrete trucks rolled in about 7:50am. Apparently they're not allowed to get started any earlier, and with the concrete pump truck attached, it's easy to see why - it's a pretty noisy operation and lasts for hours! Anyway, they were all setup and pouring concrete by 8:05.

The crew hard at work. They started off in the furthest corner of the slab, pouring the trenches around the outdoor room, then moved towards the front of the slab. Kind of like sanding a floor - start at the furthest corner from the exit! Meter box still crooked, but obviously will be fixed as the frame/bricks goes up.

Then, we had to leave to go to work... came back in the afternoon to see this...


yaaaay! Big huge bit of concrete! Now we're really starting to see our dream take shape. Garage on left, portico at front, and rest of the ground floor behind it. It really does take up a huge amount of land (I think our plans say it's around 49% coverage), not much at the front, sides or rear! Which is a good thing - less outdoors stuff to maintain.


View from rear of the slab. Directly in front is the home theatre room, then family room, then study, then the setdown area for garage. On the "left" of the slab from this view is the outdoor room, dining room, kitchen, laundry, powder room and sitting room. Hard to visualise right now!

Today was a pretty hot day too, around 33. Fortunately the next few days will be a little cooler with some light rain, which is apparently ideal for the concrete to cure (set) properly.

And checking MyMetricon, apparently the wall frame is due to be complete by Feb 15, just 2 weeks away!

What a journey - from buying the old house in May 09, to finally getting the foundations done Feb 2010. The next few months are sure to alternatively rush by and slow down, depending on what stage the house is up to - can't wait to see what happens next!

T&T

Tuesday, February 2, 2010

Day 42: Waffle pods and slab preparation complete!

I like Tuesdays, as I have a day off every week! Went to the site just before lunch, and caught the tradies just as they were finishing up the slab preparation. Bought them a few 6 packs of beer as thanks for working through a pretty hot morning (about 30 degrees in the sun!)


Apparently they started early - about 7am or so? Until nearly midday to get everything done.


I've seen plenty of pics of other people's slab works, but never look at it up close. From what I can tell, they've laid a big plastic sheet over the gravel, then some spacers and a steel/iron frame. On top of this, a bunch of big polystyrene waffles, then spacers, then more reinforcement. The wood bracing is just held in place with star pickets and a few metal corner joins. Looks fairly simple, but there were many string lines for measurement - looks good to me! In the above picture, the step down bit to the left is for the garage (about 150mm lower than the ground floor slab).


This pic shows the portico area. The first floor balcony will roughly go over this bit.


This pic is from the rear of the block. The trench at the bottom of the pic is where some concrete will be poured to reinforce the outdoor room pillar. The pipe sticking up roughly in the centre of the pic is for our kitchen sink! Miscellaneous other pipes in the slab area are for the powder room, and upstairs ensuite/bathroom. Pipes outside the slab area are stormwater pipes.

And the best news? Tradies said they'd be back early tomorrow morning while the slab is being poured in case any adjustments are required! I'm going to get up early and see if I can get there for half an hour before work. I threw in a few gold coins anyway, just for good luck - in case I don't get the chance tomorrow!

So stay tuned for tomorrow night's pictures - hopefully we'll have a whole lot of concrete, and a 20% invoice for the slab very soon after!!

T&T

Monday, February 1, 2010

Day 41: SS first contact and powerpit connected

Got a call from our Site Supervisor (SS) Brian this afternoon to introduce himself - how nice! He said we'd be getting a slab this week, and we're going to meet next week - not sure what for exactly, but I have a day off and want to meet him. Brian is looking after quite a few Metricon sites in the middle eastern suburbs, so we're hoping he's experienced and got good tradies organised!

Briand is also looking after our "partner" site in Blackburn - the other Metricon redevelopment that started a week before us. We went there on the weekend, and they've just had their slab done, so hopefully this is an indication of what we have to look forward to!


Went by the site today - no work on the land, but our underground powerpit has finally been connected!


So I know - it doesn't look like an underground powerpit, right? The actual powerpit is on our side of the road on the corner of our land, connected under the road to this powerpole opposite. For months now the power cables haven't been connected, but if you look at the grey conduit running up the pole, it connects to a box under the main overhead power lines to three big cables (three phase power, right?). The good news here is that now we have a powered site, we should be getting a $1000 credit on our build as the builder doesn't need a temporary power pole.

I've said it before - to anyone redeveloping their site, if you don't already have an underground powerpit near your land, organise for one to be installed well before you plan to start building!

sarahv: not much has happened so far, but really we should only be counting activity from about Day 26 or so, as there was the xmas shutdown during that period. We're hoping that once the slab is down, then some real manic activity can start! Your newhaven is certainly moving along quickly - from what I've heard of NSW builds, M are building much faster there!

mai: Expensive way to fix your fence problem is to tear it down and replace it with a taller one. But you should enquire as to whether a trellis extension added to the existing fence is sufficient to meet the 1.8m height requirement - it's cheap and easy to add in yourself! The Nolan 50 is a maaaaaasive size house!

T&T

Friday, January 29, 2010

Day 38: more slab preparation

I didnt go to the site today, but Tina drove by to find a little more work had been done in the morning.

Not much really, smoothing out the soil, laying a bit of gravel or something, but every little bit of work that's done is a bit of work towards getting the house finished!

Friday, January 22, 2010

Day 31: Plumbing complete

Had a quiet day at work today - we went to the Glenville display house on Bourke Rd Balwyn to have a stickybeak, but it was shut, so we went to our site - yay, some more action on the ground!


Got some gravelly type stuff at the front (roughly where the future driveway will be) and a bunch of pipes sticking out of the ground - I reckon these are mostly stormwater pipes, judging from their location. Probably a few pipes for sewerage too (the ones located "within" the future slab). My aunt gave us a call to say she drove by at about 2pm, and they were packing up the bulldozer onto trucks, so they probably started early today as all tradespeople do.


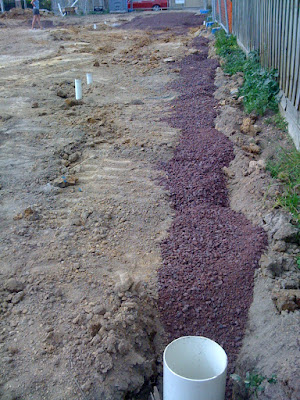
This pic alongside the fence; there won't be any slab here (approx 3m gap between the house and the fence, you can see two smaller stormwater pipes which mark the edge of the house halfway up the photo) so I'm not sure what the gravel here is for - any ideas? Also this big pipe at the bottom of the picture is not located anywhere near the slab, so maybe it's for general drainage or something?

We also found a invoice letter in the rubbish cage, and it listed another property in Blackburn that was having pipes delivered - we went there, and sure enough, near Blackburn Lake is another Metricon house going up, but they're about a week ahead of us going by the date on the invoice. Interesting how many Metricon houses are currently being built or recently finished in our area - I know of at least 7 others in the whitehorse area now!

And to go to our regular "feedback" section of blog posting where we reply to comments left on the previous post (which we quite enjoy, everyone feel free to comment on any post!)

sarahV: yep, you were right about the trench, there's 2 trenches connecting the outdoor room pillar to the rest of the slab area. Plus I've also had a look at the floating floor youtube vids too :) I've also had a play with the floating floor samples at Bunnings, seems easy enough to DIY, so I reckon we'll give it a go ourselves! Tina likes a very dark/black style of wood floor which isn't generally available in a hardwood floor, so we may end up looking at laminate flooring to get the right look - also will have a look at bamboo and vinyl plank timber look, which is apparently very good nowadays.

sean: I think the reason M give a contract time of 370 days is to avoid any possibility of them having to pay late fees; there's been another Nolan built a few streets away from us, and it was fully complete in about 7 months. We'd be plenty happy if our house was ready by August/September (best case scenario?) and worst case scenario - we're still in before xmas 2010 :). So, while M probably estimate they can finish this house in 8 months, they'll quote 12 months just to make sure they're not in a position to pay $250/week late fees!

julian: We used Gravity Demolition. Price was good, though there was about a week's delay in demolition from the date quoted, and some damage to council property which we ended up further out of pocket for, so I'm not giving them a 100% recommendation. After the demolition is done, M will send a "pre planner" to assess the site which can take 1-2 weeks, and they will check that everything is ready to commence. In our case, we had to get the neighbour's phone line shifted as it was overhanging our block of land which delayed starting by about a week. After this was done, the site was scraped about a week later.

I doubt there will be much activity over this long weekend (how come I have to work Monday?) but have saved up some other relevant pics which I'll post up during this time!

T&T

Wednesday, January 20, 2010

Day 29: Concrete piers completed

No work done these last few days, but this afternoon we found a big mound of this...


which was probably used in the construction of these things...


Yup, we've been piered! A whole bunch of concrete piers drilled down into the earth, to help stabilise the soil under the slab.

Plus a small little trench dug in the back end of the slab, I'm thinking for stormwater piping?


Hopefully this means things are on track for a slab on the 28th, so we're hoping for more piping work to be done between now and then.

Also contacted our new CSC who forwarded us the official "site start" letter. Apparently our contract completion date is Dec 29, 2010. We're hoping to be in many months earlier!

And to reply to some earlier blog comments...

SarahV: we haven't fully decided on our flooring yet, but will probably be carpet to upstairs & HT room, with timber floors or laminate flooring to the rest of downstairs. We're happy enough to go with quad edging, there are "transitional" pieces available to connect between timber floors to tiles or carpet, or any other flooring of different height. Flooring can be done after handover without too much problems, and we won't do it immediately anyway as $$$ might be starting to get a little tight!

If you want the flooring installed without quad, maybe ask your SS to have the skirting painted but not fitted, may make things easier for flooring after?

B&T: check the links on the side of this blog, as there should be a link to the "metricon universal info" page on homeone that I started, should have more prices on electrical items there too! Also don't forget that if you're building a single storey house, it's relatively easy to wire in speakers through the walls after handover, slightly more difficult if you're building a double storey house with a room above. I've been trying to settle on my HT room design for ages now, I'll probably get a rebuild of the HT room after handover anyway to get it the way I like!

T&T

Sunday, January 17, 2010

Day 26? Meter box and pegout.

Got back from NZ last night, drove by the site this afternoon (Sunday) - found out that we now have a meter box erected and connected to the underground powerpit, as well as a whole bunch of pegs outlining where the slab will go - I think?


So it looks like hopefully we'll be getting some preparation work done this week and maybe a slab next week!

Also got a letter from Metricon - we have a new construction CSC now... perhaps the other one left? No big deal. Also a letter from our neighbour about replacing the rotten rear fence - while we were in NZ she had a sundeck erected over her rear deck, you can just see it in the above photo - and the rear section of fence is just rotten and vine infested. The quote is for about $1300, I had an earlier quote of about $1000 but after many calls to the fencer he never got back to giving me a written quote, so I'll give him one more shot - otherwise we'll just go with the quote from the neighbour.

B&T: Most builders won't allow non-builder tradespeople on site, from what I've heard. Even if you get flooring done through M, they fix the skirting, lay flooring (eg timber floor) and add quad to cover expansion gaps, I don't think they hide expansion gaps with skirting - certainly in all their display homes timber floors have quad. You could always ask for M to not fix the skirting in place if you really don't want quad on a floating floor? They'll also email you an electrical document before the electrical appointment with prices and pics of the fittings available so you can plan your electrical layout, best to start working on that now!

T&T

LinkWithin

Related Posts with Thumbnails