Showing posts with label fixing. Show all posts

Friday, June 11, 2010

Day 171: Laundry waste pipe moved, painting has commenced

According to MyMetricon, we've had the Fixing Stage completed as of 10.6.10! Time to check under the couch for coins and sell off unwanted items on ebay to pay yet another 20% of the build cost - though this means there's only 10% +/- variations to go, and that'll be at handover!

Today, someone with a very big hammer came in to cut out the floor of the slab in the laundry to move the waste pipe; which long-term readers will recall was incorrectly positioned under the laundry cupboards.

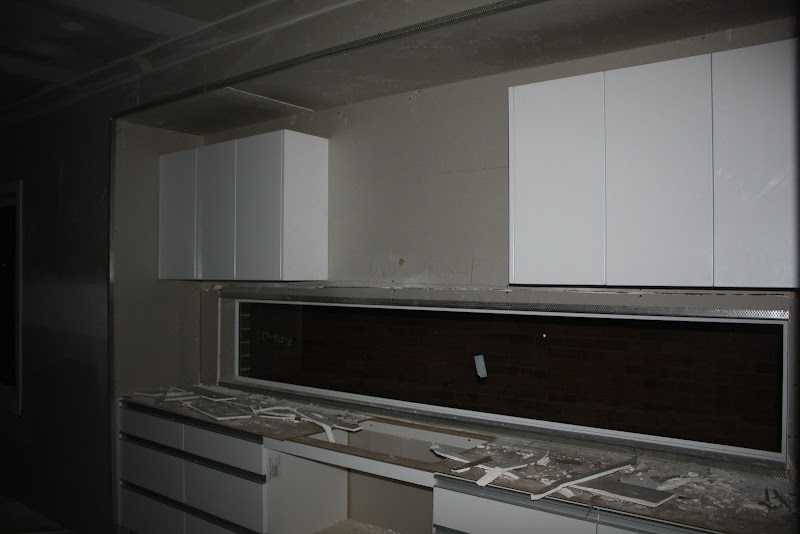
I didn't go to the house today - this is Tina's photo - but to me, it looks like there's a mini-garden in the laundry, where we could possibly grow vegetables. Ideally though, we'd have a bit of concrete and some tiles there, which is the conventional use of a laundry.

From our independent inspector's report:

"Item 18. The plumbing floor waste in the laundry which is to be located below the washing
machine is installed with in the laundry cabinetry area. The drainers will be required to
relocate the pipe. This will involve cutting and jack hammering the slab. The appointed
engineer will be required to supply a rectification plan to reinstate the slab removed as the pipe is being significally relocated. The slab penetrations are sealed with termite protection seals. This will also be required to be reinstalled by the termite protection firm. Recommend viewing the appropriate documentation to cofirm these works have been completed appropriately."

So what we'll be doing is emailing our CSC and SS to confirm that we'll get a copy of the engineers' report regarding fixing the slab where its been cutout, plus confirm the termite protectin will be reinstated. That's one of the dangers of modifying a volume builder's plans too much - the additional things may not be done ideally the first time around. As long as things are fixed properly though, the end result should be fine. I wanted a drain waste under the washing machine position as I have many memories of my mum's washing machine getting blocked, or pipes leaking/splitting, and the laundry flooding the house as a result!

The painters also came today - they were meant to start Monday, but have been delayed as we've insisted on the various lockup items to be fixed first. Today, they came in and covered the stairwell in protective plastic, and started with a layer of primer on the doors. We'll have to check the doors are painted all around, including top, bottom and sides; not just the obvious main 2 sides.


Our new SS, John, also called me this afternoon to tell me of the day's progress. I did mention the manhole was in the wrong spot (see the last blog entry) and he said he'll check it out. The plasterer should be back again on Tuesday to do a final plaster fix so the painters can really get into things. MyMetricon says painting will be done by 18.6.10 which is highly unlikely - probably towards the end of June would be more realistic. I like our new SS - he's only just started with Metricon, so hopefully he'll be particularly attentive to the fine details, but he seems open and communicative, as was our last SS.

T&T

Thursday, June 10, 2010

Day 170: Waste pipe fixed, kitchen window moved, but manhole in wrong spot.

Carpenters were in the house today getting busy on a couple of items; first of all, the cutout floor joist has been repaired. Just need a plasterer to come and repair the hole.


Also the kitchen window has been moved down an inch or two to allow the stone benchtop to fit properly - glad to see this being done! However now we're missing the wood header that normally goes above the window, so will have to make sure that's rectified.


Also, to move the kitchen splashback window, the brick sill on the outside had to be removed, so at some stage the brickies have to be called back in to replace the sill.

Also some trimmings around architraves were put in. Now, there's also a manhole access panel in one of the rear bedrooms, to access the ground floor roof. Our last SS (Monique) was aware that due to the final roof truss design, this manhole should be in Bed 4 instead of Bed 3, but I think that information wasn't passed onto the fixing carpenters.

Can you see what's wrong with this picture?

You'd have to be pretty tiny to be able to get into the roof space with all those roof trusses in the way! Anyway should be a pretty easy job to move that manhole to Bed 4 and get this plaster hole repaired, will email our SS tonight about it.

T&T

Wednesday, June 9, 2010

Day 169: Getting ready to fix our floor joist problem!

No work done on site today... we think... but here's some details of little things being fixed up.


The front door frame was installed during frame stage, and our brickies bricked up around the front door, but there was a little gap above and on the sides of the door frame. Above the door frame now there's a strip of timber cut to size to close in the gap, and there will probably be a couple more on the sides to close over the other gaps, and all will be stained to match. And the steel lintel above the doorframe should be painted too, but all these little details can be fixed anytime. Similarly, the internal access door from the garage had gaps all around, but have been closed in with more timber - looks much better and best for sealing out draughts!

Now, finally - the main item identified in our independent inspection is being attended to!

The upstairs WC next to the main bathroom - the wase pipe was cut through the top beam of the floor joist, as you can see above. This cutout is just over the kitchen island bench. The same thing happened with our ensuite shower waste pipe, but that was fixed prior to plastering. In this case, the plasterers came in too soon and plastered over everything before this could be fixed - but now with the error exposed, when the carpenters come back to fix up a few other little things (including the kitchen window reveal) they can rectify this error; probably by adding a reinforcing thingy around the cutout in the joist. And once this is done, then painting can get underway asap!

T&T

Tuesday, June 8, 2010

Day 168: Some further plastering/carpentry, and onsite meeting with our two SSs

This morning, the carpenters were in and added the missing noggin in the garage (only 1 required, not 2 because they're only for plaster fixing), as well as installing the balcony!


Plus some other carpenter type things were done, installing/closing gaps around the front door and internal access door with timber strips (that will be stained/painted to match). Now, if we only had a key for the balcony french doors (below), the waterproofers can go and waterproof the balcony so the tiling, guttering, and portico plastering can be done.

Also had a plasterer in today, installing the plaster under the top flight of the stairs and tidying up some other spots. He also repaired the two holes in the ceiling where the carpenters tried to find the damaged floor joist to repair... more on this later!


I guess the big things for today was our on-site meeting with Monique and our new SS John. MyMetricon was updated yesterday to say we were getting a new SS; because Monique is so busy with all the Balwyn builds, John will take care of us and our neighbour down the road (who just had the slab down for their Chelsea - congratulations guys!).

So anyway, we had a page of things that we were mainly concerned about and wanted clarification before any further work was done, and happy to say that we're satisfied with how things are being assessed and fixed.

1) Damaged floor joist: I pointed out to John that the damaged joist was directly under where the upstairs WC waste pipe was located. Since the carpenters had already tried twice (and failed!) to locate the joist from the ground floor, John got upstairs and banged through the plaster adjacent to the waste pipe, clearly marking out on the kitchen ceiling where the joist needs repairing. Should be an easy fix now!

2) Kitchen problems;
  • Kitchen stone bench on the side will go right into the window splashback reveal as per the earlier pic posted- carpenters will cut out all the wood/plaster that's blocking the benchtop.
  • Gaps, missing laminate strips - will all be fixed when the kitchen people come back in for the benchtops, or by the painters. Pretty minor but annoying stuff.
  • Rangehood: Will be externally ducted, will be dealt with later during the electrical final fixing.
  • Cables from the walk-in-linen - to be repaired by plasterer where they've been incorrectly pulled through in the fridge alcove.
3) Laundry waste: Been in the wrong spot for months, but the plumbing people responsible are aware it needs to be moved before tiling.

4) Garage internal access door: A replacement Balmoral-2 door has been ordered, as there was an estimating error somewhere - someone forgot to count all the doors correctly! And the missing noggins have been fixed this morning.

5) Rumpus room doors - Will leave them hanging the way they are, as they're set up for "right handed people" the way the right door opens. Not a big deal ultimately.

So, looks like things are geting back on track! John used to be a painter apparently, which should be a good thing, if it means he has an eye for detail!

The plans for the next few weeks:
  • Carpenters back in sometime this week to do the final fixes and repair that joist
  • Painters might start next week, and take around 2 weeks to complete internal painting
  • Tiling around the start of July
  • By August, final fixings, and maybe firming up on a handover date by that time too!
T&T

Wednesday, June 2, 2010

Day 162: Some plastering, and pre-paint assessment

Found that the plasterers had been in today, and installed the missing plaster in the kitchen.


However, the kitchen window still hasn't been moved, which will be an issue for when the ceasarstone benchtop arrives. It's meant to cover the side bench and into the window reveal, which at the moment is at least 15mm higher than it should be. Will bring it up with our SS this Friday.


In this pic, they've also plastered over the fridge alcove bulkhead. This is where our inspector picked up the bulkhead was in contact with the floor joists:

Item 11. The stiffening beams installed over the kitchen bulk heads are incontact with the floor joists which are therefore load bearing and are not end supported. As this bulkhead is not intended to be load bearing, there should be a clearance left between the floor joists and the bulk head.

So has this has been fixed? Who knows??!! *sigh* another item to bring up with the SS. Also where that bunch of cables are poking out through the wall - they're not meant to be there!!

For me though, the main item from our inspectors' report still to be fixed is Item 12. The sewer waste pipe over the kitchen area has been installed through the top flange of the smart joist. The manufacturers of the ‘Smart Joist’ do not allow cutting out of the top flange as noted on their ‘SmartJoist’ hole chart. Recommend the manufacturers supply a rectification design for the damaged floor joist. This item is still not fixed, and I want it fixed before any painting starts - mainly because this is a fairly serious structural problem. Come on guys, it's not that hard to fix! Find the upstairs toilet, and mend the damaged floor joist underneath it, rather than randomly cutting holes in the ceiling hoping to magically stumble across where it needs to be fixed.

And someone else has been through the house with a pencil, circling hundreds of tiny little dents and scratches to be fixed up and smoothed over before painting starts.


Nice to know some small faults are being identified, but as I keep harping about, it's our inspectors items, in particular the structural fauls with the house, that we want fixed before any further work is done. We haven't received a fixing invoice yet, but I want to know how our inspector's items are going to be fixed before payment is made - only reasonable when you're spending a few hundred thousand on a house, that you want faults fixed!

T&T

Monday, May 31, 2010

Day 160: Doors & skirting installed, fixing inspection items

Carpenters on the job today, with almost all the internal doors hung.

First of all, our front door has been installed- a Corinthian 6G in 1020mm wide. Will be stained dark, with a 750mm pull handle and mortice lock.

Next up; home theatre doors. I actually wanted the doors hung opposite to how they are in this pic: if you look closely, the right door has the opening handle, and the left door has the mushroom stop.

I did mention to our SS that I wanted the doors hung the other way - admittedly on the floorplan, they're drawn to this specification. I wonder if it can still be fixed - would involve moving the mushroom stop to the right side door, taking out the handle mechanism from the right side door (and filling in the gaps), and putting it on the left side door.

Upstairs now, this shows the upstairs linen closet. For some reason we had to choose totally different handles for linen doors (we chose rectangular handles that match the vanity handles) as you can't put the door handles you use on normal doors. No big deal I guess. Can also see the architrave & skirting all around too.

The other thing too is that the internal access door is a plain flush door, but we specified at our colour appointment that all doors are to be Balmoral-2 design - we think someone at M head office counted the number of doors wrong! Will contact our SS to see if the missing door is going to turn up soon.

In addition to doors & skirting, a couple of the inspection items are starting to be fixed, yay!


Above, Item 17. The noggin in the wall of the kitchen, below the stair case, has been removed. A small square of plaster has been cut out, and the noggin replaced. Should be pretty easy for the plasterers to seal it back up. In addition, all the data cabling etc is poking out on the left side of the pic - this pic shows the fridge alcove, and the data cabling should be on the other side of this wall in the walk-in-linen. Easy enough to plaster over though.

Another item has been attempted to be fixed...


12. The sewer waste pipe over the kitchen area has been installed through the top flange of the smart joist. The manufacturers of the ‘Smart Joist’ do not allow cutting out of the top flange as noted on their ‘SmartJoist’ hole chart. Recommend the manufacturers supply a rectification design for the damaged floor joist.

Looks like the carpenters aren't exactly sure where this sewer waste pipe defect is, so this cutout in the ceiling is in the wrong spot. To make it easy for the carpenters to find the spot, they should go to the upstairs WC and poke a long drill bit directly adjacent the the waste pipe, and where it pokes through the ceiling is where they need to fix the defect - but I don't want to tell anyone how to do their job, so maybe we'll just sit tight and see how they go about fixing things! Ultimately the ceiling and kitchen needs to be replastered as most of the defects are in this area so the end result will be good - we hope!

T&T

Friday, May 28, 2010

Day 157: Sparkies on site

Little bit of work done today, with the electricians running in some wiring to the garage now the roof there has been completed. While I couldn't get my 3 car garage, or even a workshop, at least there's plenty of powerpoints and a TV outlet!


Near the front of the garage is a double powerpoint, plus light switches for the ceiling fluoros and an external light.

There'll be two fluoro lights on the ceiling - can never have enough light in the garage for working!

Inside the sparkies have starting locating wiring for powerpoints and switches. We've placed the washing machine powerpoint and water taps on the wall above the machine (hate bending down to turn things on & off inside cabinets!)

Apparently someone from the cabinet company came by to check on the installations today too, and have left this sign:


So while the fixing stage is meant to be complete by 31.5.10 (according to MyMetricon), I very much doubt it'll be complete by then unless teams of tradies work throughout this weekend. The definition of the fixing claim stage being complete is:

"The stage when plaster is hung (decorative cornice may not be complete) architraves, skirting, doors, baths, basins, troughs, sinks, cabinets and cupboards are fitted and fixed in position. Attached garages, front porticos and carports are completed (Granite installation may not be complete). Or percentage of works completed."

Erm... we have no doors, no skirting, no architraves, missing plaster in the kitchen and none in the garage, portico isn't even started and many items from the lockup inspection haven't been addressed - so should we receive a fixing invoice in the mail before these items are completed, there's no basis for us to pay it!

T&T

Thursday, May 27, 2010

Day 156: Garage roof in daylight

Day off sick today - first one in years; but managed to drag myself out of bed to drive past our house. Looking good with the roof finished over the garage now!


Also got a call from our SS today - the fixing carpenter should start work tomorrow, doing things like doors etc and also addressing the issues from our inspection; and probably painters coming in the week after next (hopefully the missing plaster in the kitchen will be installed and sanded by then!). Tina's going to meet our SS next Friday to check on inspection issues and to get a feel for how everything is going so far.

T&T

Wednesday, May 26, 2010

Day 155: Garage roof done, and more work in the wet rooms

Turned up at 7pm and astonished to find someone still on site!

Anyway, we're thinking that the tilers came in the morning to finish off the garage roof - finally no more rain and mud in our garage area! Been keenly anticipating this part of the roof being done, as there's not much more to do for the facade to be complete.


However there's a couple of little things that need fixing in the garage roof - I think the rear gutter is incomplete, and there's a couple of noggins missing from the truss in the pic below. Easy to fix providing it's done before the plaster goes up!!!


The people who stayed back to dinnertime were working in the wet areas, just finishing off some cabinetry work.

In the ensuite (above pic), handles have been installed, basins placed in rough position (won't be sealed in until ceasarstone delivered) and a big backing board for the wall mirror mounted. Because of the little drawers in the ensuite vanity, the handles here are smaller than used in the other vanities; but still looks good.

And in the bathroom, handles, basin and mirror backing board installed. Still no more items from our inspection fixed yet.

T&T

Tuesday, May 25, 2010

Day 154: More waterproofing

Some more waterproofing - at least I think that's what all this blue stuff is.

Around the ensuite bathtub. Colour actually looks quite nice!

And also in the bathroom around the shower & bathtub. If you look at the shower base, you can see a little white lip, but this should be hidden by the floor tiles.

Trying to organise a meetup onsite with our SS for next week, as according to MyMetricon, we're meant to be finished the fixing stage on 31.5.10 - and then we're onto the final stage! Though what we are trying to find out at the next meeting is what's happening regarding our independent inspection items, as they really need to be fixed before any further work is done in the next stage. We've paid all our stage invoices on time up to now as progress has been OK, but the fixing stage invoice for 20% won't be paid unless we're happy with how the issues identified so far will be rectified. They're not particularly difficult to fix, but not much has been about them as far as we know!

T&T

Sunday, May 23, 2010

Day 152: Kitchen and vanities installed on a Sunday - Good, and Bad!

After a little sleep in, thought we might go past our house today, and weren't we surprised to find some people working hard to install our cabinets - on a Sunday of all days!

At this point, I think it's important to mention that while we like to have a lot of work being done on our house, recently it seems that speed is overtaking quality control - mainly concerning the laundry and the kitchen. We'll get to those 2 things later, but let's have a look at the vanities which are being installed without too many issues - so far.

First of all - the powder room vanity. This has polar white cabinets, and will have Urban (grey) Ceasarstone drop benchtop with a semi-recessed Liano basin. So far, no problem.

The vanity sits on a little pedestal which will be tiled, as well as tiled skirtings.

The pic above is of the bathroom vanity, no handles yet. Again, polar white cabinets, Urban ceasarstone benchtop.


And this one is the ensuite vanity, double doors under each sink and a stack of 3 drawers in between the sinks. OK so far. Same colours as before.

Now here is where things start to go wrong... anyway, this next pic is the kitchen - looks good in this angle! New Graphite on the island bench, and Pearl Frost (or is it Frosty White?) on the cupboards.

The next pic is a closeup of the island bench. One door is missing - apparently was scratched, so a new one ordered. The other issue is that the two doors under the sink cutout - the handles rub on the surrounds, so they'll need fixing.

But the real problems are all to do with the side bench. Have a look at the next photo.

See the exposed plywood on the side wall? It was left unplastered so it could be fixed at the top. Same with the missing plaster on the bulkhead. However, you'd think the cabinet installers would realise the plaster is yet to be completed, but no... they've plowed on anyway and stuck on the side bench and overhead cupboards, with a few random bits of plaster against the plywood. In addition, the kitchen window is 15mm too high, which means the stone benchtop won't fit right - it's meant to reach right into the window reveal.

So what needs to be done here? The overhead cupboards and bench need to be removed so that plaster can be correctly installed on the side and bulkheads, fixing screws plastered over and sanded. There's no way for an acceptable plaster fix to be done with the cupboards and bench in the way, I don't think! And the window needs to be corrected - a job for the carpenters. Then the kitchen can be re-installed.. *sigh* wouldn't it have been easier if the installers hadn't been organised until things had been fixed first?

However, apart from these issues regarding the order of fixing, we do like the colours and how they've come together - in particular, the flush handles we picked are very streamlined, and don't stick out of the drawers so you don't end up bruising your leg against them while working in the kitchen!

And here's issue number two. Laundry bench is Polar White, with New Graphite benhtop. We added in a floor waste to the laundry to be positioned under the washing machine position, and this is clearly marked on our plans. But the floor waste pipe was put right next to the laundry sink waste pipe. This issue was mentioned several times, months ago (I think March at least!) and also picked up by our independent inspector - but despite this, the floor waste still hasn't been moved. And what does this mean now? The laundry cabinets have been installed, the installers have cut out TWO holes in the base of the cupboard - one for the laundry waste, and one for the floor waste (the one on the left of this pic), which isn't meant to be there. *sigh*... so what has to be fixed now? The laundry bench has to be taken off, floor waste position corrected and termite protection around the pipe reinstalled, the base of this bench needs to be replaced and then reinstalled.

Now if only the kitchen and laundry had been left until this looooong outstanding issues had been fixed, it would make like much easier for all the tradies involved, instead of a problem being identified, ignored while work steamrolls blindly forward, then everything ripped apart, fixed, and then started again. One very quick step forwards and three long steps back. *sigh*...

We're hoping work will still continue at its rapid pace, and we're loving how our house is starting to look, but it'd be nice to have these niggling little issues resolved prior to ongoing work being done. Still many other items from our independent inspection to be rectified in the frame - again, which has been plastered over. Be nice to get an update on progress too - haven't had a call from our SS in a couple of weeks?

T&T

Saturday, May 22, 2010

Day 151: Site clean, and noticing other work done during the week

Turned up at the house this afternoon to find a bloke doing a site clean - finally, all the broken tiles in the backyard are gone, and a much neater site for the trades to work on.

We were able to discover some other things that have been done during the last week; first of all, the missing garage roof truss has been delivered and installed.


You can just about figure which roof truss has been installed, as it's missing horizontal noggins on either side of it, just above the garage side wall.

Also, the shower bases in the ensuite and bathroom have been flush finished.

The cool thing about the showers we're getting, is that the tiling is totally flush and continuous from the shower base to the floor of the bathroom - there's absolutely no lip or raised guttering required! Very modern and minimalist - it'll look fantastic!

Finally, Item 15 from our independent inspector's report has been rectified.


From his report: "15. As per AS1684.4 for timber framing table 8.3, ply bracing requires fixing along all edges at 150mm maximum spacings. The ply brace on the kitchen wall adjacent to the window has not been nailed along the top edge. The structural engineers bracing design will also detail these fixing requirements. Recommend viewing the documents for confirmation of
the requirements." If you look closely in the above pic, you can see quite a few additional fixing nails in this ply brace - probably twice as many as required, but better too many than too few!

Still many other inspection items to be rectified, so as they're done we'll tick them off our list.

We're thinking that a few things need to be fixed before the kitchen & vanities go in - first of all, the remaining issues in the kitchen area need to be fixed, so that plaster can be finished before the kitchen is installed. Also, the laundry waste needs to be moved from out unde the cabinet position before that's installed too. Hopefully our SS is on the ball with that too!

T&T

Friday, May 21, 2010

Day 150: Stairs installed! Kitchen, vanities, sinks, doors, skirting/architraves delivered!

Wow, what a day of activity at the house! I didn't get to go due to work, but Tina got to catch all the action today.


A couple of guys from Slattery & Acquroff installed our stairs today. I was always a bit unsure about these stairs - big upgrade from the standard stairs, but looking at them now, they're worth every cent! Will get brighter photos of the finished product tomorrow. The great thing is that because of their slim design, they make the corridor adjacent to the stairs feel even bigger, and the cantilevered projection of the stairs makes them a real feature that you can just see from the front door too. LOVE them!

Also a whole bunch of big internal doors delivered - Tina thinks we may be one short, as for some reason our internal access door is a standard flush door and not a Balmoral-2 design like we've specified for all doors. Also the door frames and fittings also delivered. Not everyone likes the Balmoral-2 design (small panel on the bottom, large panel up top) but they're a major feature for our house, love them!


And our family room is absolutely packed full of cabinetry - we've got a whole bunch of kitchen cabinets, plus all the vanities and laundry bench here waiting to go in. Exciting! Also some skirting/architrave delivered today, and a manhole cover. Woo!

And also the laundry sink (Clarke), and the Caroma Liano basins. We've decided to have inset sinks everywhere except for the powder room, which gets a semi-recessed sink. Looks nice, but you get a lot less bench space - so only suitable for the powder room.

Very happy to see so much activity going on of course - it's really starting to feel like our house now that the internal selection items have arrived, and will be exciting to see how they look!

T&T

Tuesday, May 18, 2010

Day 147: Some waterproofing commenced

Bit of a drama last night... after selling my GTR, I've been driving around my very first car (which has hung around as a spare car all these years), which broke down just a little last night. Got it towed home, then to the mechanics today, who were able to diagnose and replace the faulty distributor on the spot. Anyway, drove past our house to test it, and found a bloke there doing a little spot of waterproofing.


From what I can tell, the bathroom & ensuite wet areas (baths & showers) have had the mixer taps and spouts sealed in, as well as the ensuite niche below.

Still quite a bit more waterproofing required before the tiles can get started.

T&T

LinkWithin

Related Posts with Thumbnails