Just a quick whinge today - if you're given the option to NOT use Clipsal products, take it!
We prewired the house for networking, and of the 10 points, around half are useless. The problem lies in the actual plug in ports for cables, where the ports just disintegrate, fall into the wall cavity, or grab onto the network cables and refuse to release them.
Terrible quality, would never use again, 0/10.

Saturday, March 16, 2019
Monday, August 6, 2018
House repairs - attempting to DIY repair a damaged wooden exterior door
So again - no updates for a very long time - been busy with life and work and everything else!
Recently we've been doing a lot of petsitting since our dog Hannah died in 2016. Agreed to look after a beagle/cavalier cross for a friend without meeting the dog first - big mistake! After one night, he'd torn up our lovely back wooden sliding door... making it look something like this!


Recently we've been doing a lot of petsitting since our dog Hannah died in 2016. Agreed to look after a beagle/cavalier cross for a friend without meeting the dog first - big mistake! After one night, he'd torn up our lovely back wooden sliding door... making it look something like this!

A few little scratches here...

Some more big scratches here, a few mm into the door itself!

Not sure if you can see the chunks missing at the bottom of the door! And no, that's not the guilty dog in the background - yet another doggo we're looking after!
So anyway, we're left with a rather sorry looking rear door. I thought about getting a professional in for the repair, and figured (as usual) I'd give it a crack myself. I mean, the worst case scenario would be I'd call in a professional to repair my botched job anyway, right?
So, off to the big green shed with $2.50 sausages to buy some supplies.

Picked up some masking tape, exterior wood filler, a metal blade and a bunch of sandpaper. Before going any further, I removed any loose wood from the scratches and rubber everything down with a rag to remove any dirt/dust and loose bits.
Then, taped up the glass next to the damaged areas.

Opened up the wood filler, and began slapping it into the damaged areas, using the metal blade to gets things kind of close to right. You don't want to put too little in (which will leave a depression) or have too much which will take ages to sand down.
Aaaaand.... that's as far as I got. The filler needs a while to set (it says 3 hours) and then I got distracted by playstation and went to play some games. Hopefully this weekend I'll have a bit of time to get sanding.
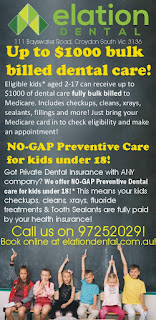
And for anyone living in Melbourne's outer eastern suburbs/Yarra Valley, we're proud to announce the opening of Elation Dental in Croydon South!

Located at 111 Bayswater Road (corner of Eastfield Road, at Eastfield Shopping Centre) our brand new, state of the art dental clinic is now open to serve our local community!

We've got some great opening offers - for example, up to $1000 bulk billed dental care for eligible kids under Medicare CDBS! Also NO-GAP Preventive care for all kids/teenagers under 18 - that means checkups, cleans, xrays and tooth sealants are fully paid by your private health insurance!
Plus if you're an adult with ANY private health insurance from ANY company, your complete checkup package (worth $385) is only $50 gap!

Anyway, for more details on our clinic and location, click here to visit Elation Dental Croydon South!
And for our readers on the west side of Melbourne, Verdant Dental at 326 Keilor Road Niddrie is available to welcome all new patients!
Thursday, June 8, 2017
Tim's tips for the easiest things to grow in your vegie patch - get fresh, save money = winning!
Though it was a bit hard to get out of bed this morning (as it was 4 degrees and I forgot to turn my oil heater on!), it was worth it to get out in the garden on a non-rainy day to tidy up the vegie patch.
Unfortunately no pictures of my actual vegie patch (due to it being a bit muddy and an uncharged mobile phone), but my top tips for planting (given that I usually kill anything I do in the garden) are...
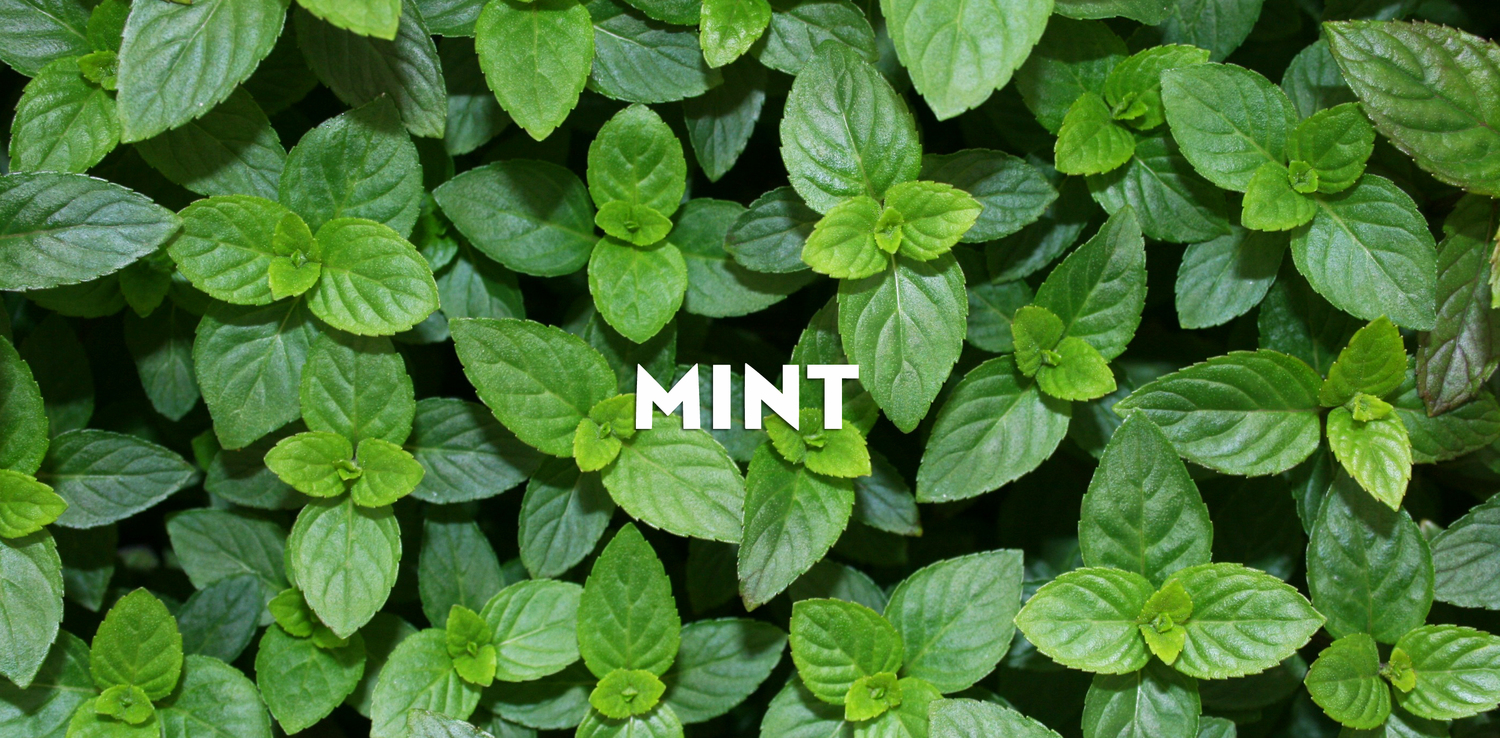
Mint is great to grow - it's just about impossible to kill, and great with many of my favourite winter dishes (lamb in particular!). Plus if you like a bit of tea in winter, try adding some crushed mint and sugar - trust me, it's amazing! Picked that one up in Morocco...

Rosemary is pretty good I reckon - it's a reasonably decorative plant which is flowering in autumn, very drought resistant, grows anywhere (I've got it growing in builder's mud and it's doing fine!) and just like mint, it's beautiful on lamb dishes. I'm particularly fond of it in a slow roasted lamb shank.
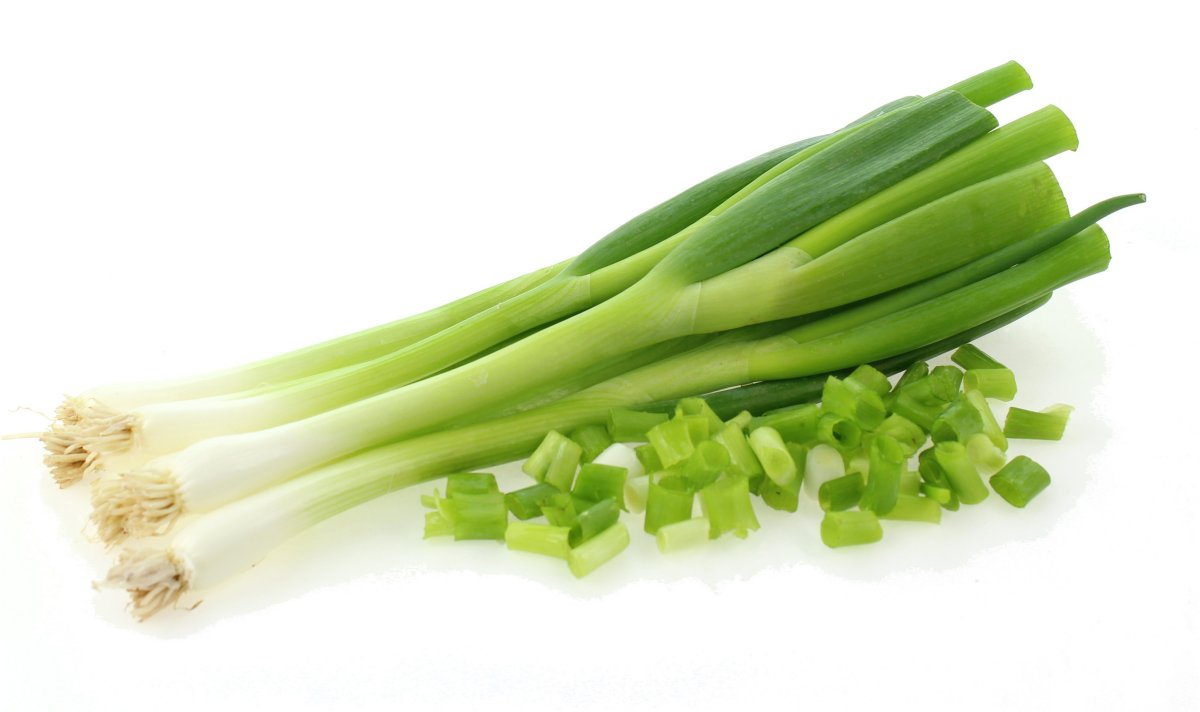 Maybe this should be number 1 - I use it all the time in asian cooking, but you can use this pretty much on any dish calling for it! Go grab a bunch of spring onion from the supermarket or asian shop for $1 or so, chop off the bottom inch with the roots attached, and go stick these roots outside in your vegie patch. It'll take well, and start growing new shoots, which you and chop off and use over and over again! Though I usually rip it out after 6 months as it gets a bit woody. Then you just get some more spring onion, replant and start again!
Most other health fund benefits expire at the end of the calendar year, so we usually are extra busy in December. Defence Health is the one major exception - so call Verdant Dental on 9379 3736 and we can get you seen before your health fund benefits expire!
Tim
Unfortunately no pictures of my actual vegie patch (due to it being a bit muddy and an uncharged mobile phone), but my top tips for planting (given that I usually kill anything I do in the garden) are...
1) Mint
Mint is great to grow - it's just about impossible to kill, and great with many of my favourite winter dishes (lamb in particular!). Plus if you like a bit of tea in winter, try adding some crushed mint and sugar - trust me, it's amazing! Picked that one up in Morocco...
2) Rosemary
Rosemary is pretty good I reckon - it's a reasonably decorative plant which is flowering in autumn, very drought resistant, grows anywhere (I've got it growing in builder's mud and it's doing fine!) and just like mint, it's beautiful on lamb dishes. I'm particularly fond of it in a slow roasted lamb shank.
3) Spring Onion
Verdant Dental are Melbourne's Defence Health Preferred Dentists!
Free dental checkup, clean and fluoride treatments for eligible Defence Health members!
Finally, now that we're in June, I figure I'll put out this bit of public information - for anyone with health insurance and extras with Defence Health (includes Navy, Army, Air Force etc) then your extras benefits expire at the end of June 2017! If you have Defence Health Extras Premier, Value, Top Extras or ADF Total Package then you should receive your dental checkup clean and fluoride for free if you attend at Verdant Dental!Most other health fund benefits expire at the end of the calendar year, so we usually are extra busy in December. Defence Health is the one major exception - so call Verdant Dental on 9379 3736 and we can get you seen before your health fund benefits expire!
Tim
Tuesday, March 7, 2017
A cooking session with Adam Liaw thanks to Metricon!

So last month we managed to grab an invite to see Adam Liaw cooking at the Metricon display home in Burwood East.
Must admit - we've both got a massive crush on Adam Liaw, who won Aussie Masterchef back in 2010. He's had an amazing career since then, and if you haven't seen his cooking shows on SBS (Destination Flavour: Japan is our favourite!) then do yourself a favour and go stream it now!
The demonstration was mostly about Chinese New Year, so I got to make a few dumplings (poorly) with Adam. We also got to have a good look around the display home, which in typical Metricon style was fully maxxed out with amazing features.
In retrospect, would've been nice to have a butler's kitchen in our house... as well as a butler to cook for us! With the long hours we're spending at Verdant Dental Niddrie, we're usually back home late eating reheated frozen food, which is a long way short of a Masterchef meal!
And of course I'm obliged to finish this post with some good news and an offer for everyone out there - if you have private health insurance (with extras) from HCF or Defence Health, you're probably eligible for a FREE dental checkup/exam, clean at Verdant Dental Niddrie! In particular, HCF members who are eligible also get free dental xrays and a free fluoride treatment, as well as a free mouthguard every year at Verdant Dental Niddrie!
To make an appointment at the best dentists in Melbourne (Verdant Dental, obviously!), give us a call on 03 9379 3736!
Tim & Tina
Sunday, November 6, 2016
Bye Bye Hannah - and up to $1000 in free dental care for your children!
A little while ago we said goodbye to the dearest member of our family, Hannah.

We got Hannah from when we bought our first house in Mitcham - the owners had two Jack Russells and were downsizing, so we bought the house on condition we got to keep Hannah. She's a Jack Russell/Mini Foxy cross, full of energy, a little bit cheeky and loved to cuddle up to us.
So we've been driving around looking for another little pup to adopt - there's a great shelter called Pet's Haven Animal Shelter out in Woodend who we've donated to, so if you're looking for a pet for your place - please don't buy one from a pet shop! Rescue and adopt a shelter pet instead, and they'll love you forever.
From little dogs to little adults now - did you know that your kids might be eligible for up to $1000 in free dental care at Verdant Dental - Suite 1, Level 1, 326 Keilor Road Niddrie Victoria?
In order to check, just give us a call on (03) 9379 3736 from 9-12, or 1:30-4:30 Monday to Friday! Ask Tanina at the reception desk to check if your kids are eligible - all you need to do is tell us your Medicare number, give us a contact number and we'll call you back once we've checked for you.
We bulk bill 100% all checkups, cleans, dental sealants, fillings, fluoride etc to eligible children!
We've got some wonderful dentists who are the best dentists in Melbourne for working with kids including Dr Alpa Lodhiya and Dr Sonia Sumer, and of course you're welcome to ask for me as well - Dr Tim Wenas!.
Please note not all families are eligible as it depends on Medicare - plus the Government is attempting to wipe out dental benefits for your kids and are planning to do so by the end of 2016! If you do happen to be eligible, we'd recommend having your treatment done ASAP because after the Government scraps the scheme, it is not possible to backdate any treatment.
Verdant Dental is at Suite 1, Level 1, 326 Keilor Road, Niddrie. Close to Essendon North, Strathmore, Moonee Ponds, Airport West, Tullamarine, Keilor and Maribyrnong - we accept all patients from everywhere!
Plus we accept all Private Health Funds with extras cover through our HICAPS machine. Looking for the best dentists in Melbourne - here we are!
We got Hannah from when we bought our first house in Mitcham - the owners had two Jack Russells and were downsizing, so we bought the house on condition we got to keep Hannah. She's a Jack Russell/Mini Foxy cross, full of energy, a little bit cheeky and loved to cuddle up to us.
So we've been driving around looking for another little pup to adopt - there's a great shelter called Pet's Haven Animal Shelter out in Woodend who we've donated to, so if you're looking for a pet for your place - please don't buy one from a pet shop! Rescue and adopt a shelter pet instead, and they'll love you forever.
Up To $1000 Free Dental Care for your kids in Victoria!
From little dogs to little adults now - did you know that your kids might be eligible for up to $1000 in free dental care at Verdant Dental - Suite 1, Level 1, 326 Keilor Road Niddrie Victoria?
In order to check, just give us a call on (03) 9379 3736 from 9-12, or 1:30-4:30 Monday to Friday! Ask Tanina at the reception desk to check if your kids are eligible - all you need to do is tell us your Medicare number, give us a contact number and we'll call you back once we've checked for you.
We bulk bill 100% all checkups, cleans, dental sealants, fillings, fluoride etc to eligible children!
We've got some wonderful dentists who are the best dentists in Melbourne for working with kids including Dr Alpa Lodhiya and Dr Sonia Sumer, and of course you're welcome to ask for me as well - Dr Tim Wenas!.
Verdant Dental bulks bills eligible children who have access to the Child Dental Benefits Scheme!
Verdant Dental is at Suite 1, Level 1, 326 Keilor Road, Niddrie. Close to Essendon North, Strathmore, Moonee Ponds, Airport West, Tullamarine, Keilor and Maribyrnong - we accept all patients from everywhere!
Plus we accept all Private Health Funds with extras cover through our HICAPS machine. Looking for the best dentists in Melbourne - here we are!
Subscribe to:
Posts (Atom)